BodymindResources.com
The Art of Focus Lab
Welcome to the stretch portion of the Art of Focus! Not everybody finds it easy to sit n a cushion on the ground with a straight relaxed spine. If your body has a great deal of tension, staying in this position for 15 whole minutes can be somewhat painful. What I have done is I have extracted six exercises from the Heal Thyself Series to help you with this. These stretches will oxygenate the cells of your muscle tissue and help you let go of your neck, hips and spine. Give them a try. Ultimately, every body is different. You may need all, some or none of these stretches to sit comfortably, but I wanted you to have the option available to you. Good luck. Let me know if you have any questions on the stretches.
1.Neck Stretch
Before we begin, I need to give you a word of caution. These are neck rolls and they must be performed very carefully and very slowly. You must be very aware of any pain you may feel while slowly rotating your neck especially when you are bending it backwards. There is no reason to injure yourself unless you are careless. When you bend your neck backwards, it is imperative that you keep your mouth shut and your teeth together! With that said, let's begin.
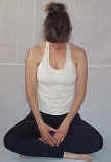
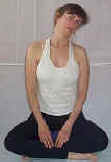
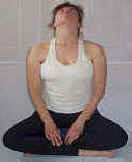
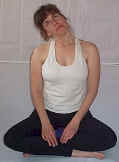
Sit down on the floor or in a chair so that your spine is relatively straight. Allow your head to drop forward and hang for a slow count of 10. Remember to breathe releasing your head more and more with every breath. Then slowly rotate your head to the left and allow it to hang for a slow count of 10. It is very important here that you actually achieve a curvature of the cervical spine (the neck part of the spine) to the left. See if you can achieve a greater, more balanced curve of the cervical spine every day that you do this exercise. After counting slowly to 10, carefully rotate your head backwards making sure to KEEP YOUR MOUTH SHUT. Slowly count to 10 and the carefully rotate your head to the right. Again make sure you are achieving a nice curve of the cervical spine. Slowly count to 10 and then rotate your head down and allow it to hang forward for a count of 10. Then come back the way you came. Slowly rotate the head to the right. Hold for ten. Keeping your mouth closed, slowly rotate your head backwards and hold for 10. Carefully rotate it to the left and hold for 10. Then rotate it down and allow it to hang forward and hold it for 10.
The above paragraph constitutes one repetition of the neck stretch. Ideally I would like you to do four repetitions per day. As you are rotating your head, if you find that there are places of tension that lie between your destinations of forward, right, left, and back, feel free to stay on those spots and stretch them out too. If you stick with this your neck will feel great and your face will start to look more youthful!
2. Gluteal Stretch
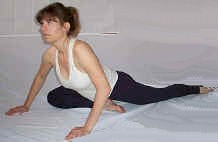 Kneel
down on the floor. Cross your right leg in front of your left. Straighten
the left leg out behind you. Come down on your elbows in front of you and,
keeping a relatively straight back, lower your body to the floor. This
should provide a stretch in your hamstrings and gluteal (your butt)
muscles. Sometimes people with tight hamstrings will feel it there before
they feel it in the gluteals. Be patient. It doesn't matter. This is a
great stretch for people who have suffered from sciatic pain caused by a
tight piriformis muscle.
3. Spinal Twist
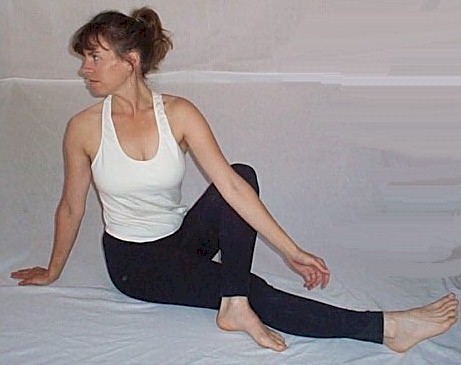 Sit
on the floor. Place your legs out in front of you. Place your right hand
behind you. Cross your left leg over your right knee and rest your left
elbow against the inside of your left knee. Keep your back as straight as
possible. We will now initiate a spinal twist. Begin by twisting the head
and neck to the right and allow every single vertebra to follow one right
after the other all the way down to your low back as you use your left
elbow to push against your left knee facilitating the twist. Hold
the twist for a count of 20 remembering to breath fully. Then
perform it to the opposite side. Do this twice on each side. It is
imperative that you begin your twist with the head and neck and follow the
twist down the vertebra in order. Come out of the stretch the
opposite way you went into it releasing the head and neck last.
4. Active Side Stretch with Breath
Strongly reach your arms out to the side. Never stop reaching even for a
second. Continuing your reach, bring your right arm up over your head
reaching towards your left while simultaneously bending your trunk to the
left. Brace yourself by placing your left hand on your left leg and
bending the left elbow. Reach out feeling your stretch all the way down
your arm to your low back. From this position, blow every last inch of air
out of your lungs as you maintain your reach. I mean really push it all
out. Then once it is out, open your mouth and take as deep and 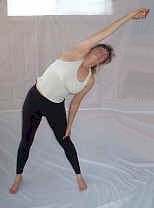 forceful
and complete a breath as you possibly can. Fill to maximum capacity and
make sure you use this opportunity to reach ever farther with your
stretching arm. Perform this three times and then move your arm to reach
slightly forward about 30 degrees from where your were reaching before.
You will feel the
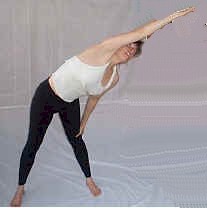 stretch move to your low back and the backs of the ribs.
Maintain your reach as you force out every last inch of air. Then, once
again, reach as you blast your ribcage open with a complete
breath. Perform this three times in this position and then repeat these
two positions on the opposite side of your body. Before you switch sides,
however, take a second to feel what it feels like to have one side more
open than the other.
5. Side Stretch Rib Aligner
 From
a standing position, Bring your hands over your hand and touch your palms
together. Reach your hands to the sky. Forcefully blow out every last inch
of air you have in your lungs. Then forcefully fill your lungs to maximum
capacity as you continue to reach upwards. Keeping your hands together and
continuing this reach, slowly bend to the right. You should feeling this
stretch all
 along
the left side of your body into your lower back. again, forcefully blow
out every last inch of air from your lungs, then forcefull fill your lungs
to maximum capacity. It is absolutely essential that you continue to actively reach as you are stretching.
Allow your breath to help remove the
tension that is making the stretch difficult. Perform it twice on each
side and then one more time in the original position with your arms
reaching straight upwards. Then relax with your arms at your side and feel
the increased blood flow to your lower back rush in.
6. Power Breath
This next exercise is a very powerful way to oxygenate the blood, relax the body, expand the ribcage and sharpen the mind.
Inhale on a count of 7. This means that by the time you get to 7, your lungs are filled to their absolute maximum capacity.
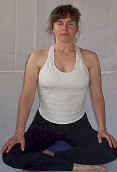 Hold this air in for a count of 28. Holding it this
long
allows you to maximally absorb the oxygen you have taken in. Usually when
we breathe, a great deal of our oxygen is exhaled before we can even
assimilate it. This exercise will actually increase your red blood cell
count!
Exhale the air slowly on a count of 14.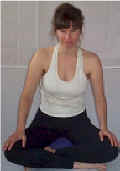 Taking this long
to release the air actually allows toxins to be expelled in the form of
gas from your lungs.
That is one repetition of the Power Breath. Do no less than 10 of these per day. Ideally you should do 30 of these per day. Find a place with nice scenery to look at as you hold your breath. It's a great way to start your morning or wake up if your afternoon is starting to drag.
There you have it. Perform these as you need them. Sometimes, when I'm sitting for long periods of time, I will get up in the middle of a sitting, stretch, and then go right back. Find a way to put them to use for yourselves. I wish you the best!