BodymindResources.com
Face-Lift Lab
Welcome to the Face-Lift Lab! Before we begin I must reiterate IF YOU HAVE HAD A SURGICAL FACE-LIFT, DO NOT DO THESE EXERCISES!!! They could undo all of the work you have had done. This is no joke. Don't test it. Please! If you have not, let's begin. Some of the techniques may seem difficult to get the hang of. I suggest you take the Heal Thyself Series to refine your skills, but give it your best shot for now and have fun!
1. Chest Expansion

 Begin
in a standing position. Bring your arms around behind
and clasp your hands together. Now raise your arms as high as you can and
then bend all the way forward. As you hang forward continue raising your
hands and allow gravity to help facilitate an even greater stretch in the
chest and arms.
Remember to breathe fully to create an even greater release. Perform this
stretch three times holding for a count of 30.
2.Neck Stretch
Before we begin, I need to give you a word of caution. These are neck rolls and they must be performed very carefully and very slowly. You must be very aware of any pain you may feel while slowly rotating your neck especially when you are bending it backwards. There is no reason to injure yourself unless you are careless. When you bend your neck backwards, it is imperative that you keep your mouth shut and your teeth together! With that said, let's begin.
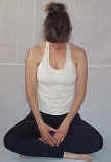
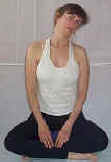
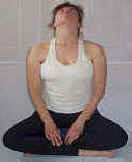
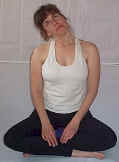
Sit down on the floor or in a chair so that your spine is relatively straight. Allow your head to drop forward and hang for a slow count of 10. Remember to breathe releasing your head more and more with every breath. Then slowly rotate your head to the left and allow it to hang for a slow count of 10. It is very important here that you actually achieve a curvature of the cervical spine (the neck part of the spine) to the left. See if you can achieve a greater, more balanced curve of the cervical spine every day that you do this exercise. After counting slowly to 10, carefully rotate your head backwards making sure to KEEP YOUR MOUTH SHUT. Slowly count to 10 and the carefully rotate your head to the right. Again make sure you are achieving a nice curve of the cervical spine. Slowly count to 10 and then rotate your head down and allow it to hang forward for a count of 10. Then come back the way you came. Slowly rotate the head to the right. Hold for ten. Keeping your mouth closed, slowly rotate your head backwards and hold for 10. Carefully rotate it to the left and hold for 10. Then rotate it down and allow it to hang forward and hold it for 10.
The above paragraph constitutes one repetition of the neck stretch. Ideally I would like you to do four repetitions per day. As you are rotating your head, if you find that there are places of tension that lie between your destinations of forward, right, left, and back, feel free to stay on those spots and stretch them out too. If you stick with this your neck will feel great and your face will start to look more youthful!
3.Lion's Pose
 This
is a stretch for the whole face and the muscles that operate the
tongue. Basically you stick your tongue out as far as you can, open
your eyes as wide as you can, and open your mouth as big as you can.
Be careful not to stretch to quickly or you may have a spasm in your jaw.
Hold this stretch for a count of ten and perform it five times.
4. Low Back and Side Stretch
 Spread your feet about three feet apart. Strongly reach
your arms out to the side. Never stop reaching even for a second.
Continuing your reach, bring your right
  arm up over your head reaching
towards your left while simultaneously bending your trunk to the left.
Brace yourself by placing your left hand on your left leg and bending the
left elbow. Reach out feeling your stretch all the way down your arm to
your low back. Hold your most intense stretch for a count of 20. Then perform the stretch
to the opposite side for a count of 20. Perform this three times on each
side.
5. Power Breath
This next exercise is a very powerful way to oxygenate the blood, relax the body, expand the ribcage and sharpen the mind.
Inhale on a count of 7. This means that by the time you get to 7, your lungs are filled to their absolute maximum capacity.
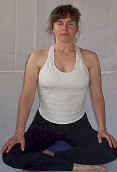 Hold this air in for a count of 28. Holding it this
long
allows you to maximally absorb the oxygen you have taken in. Usually when
we breathe, a great deal of our oxygen is exhaled before we can even
assimilate it. This exercise will actually increase your red blood cell
count!
Exhale the air slowly on a count of 14.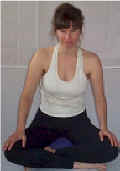 Taking this long
to release the air actually allows toxins to be expelled in the form of
gas from your lungs.
That is one repetition of the Power Breath. Do no less than 10 of these per day. Ideally you should do 30 of these per day. Find a place with nice scenery to look at as you hold your breath. It's a great way to start your morning or wake up if your afternoon is starting to drag.
6. Manual Releases of the Face
We
will now move on to the more manual techniques for releasing and
lifting the face. With these techniques, you will literally be
moving tissue from  one
part of your face to another. Let's practice first on the
forearm. Press the pads of your fingers firmly into your
forearm. Now create a tug on the tissue underneath your fingers by
moving them up the arm. Your fingers may glide a little
bit, but this happens very
 slowly. You are not gliding over the skin so
much as actually creating a tug. This is how we will do the
following techniques on your face. Take a look at the musculature of
the face. These are the muscles we will be affecting. Notice how
these muscles attach not only to the bones of the face, but to eachother.
These are the muscles we will be moving over. While we move over these
muscles, we will be contracting and relaxing them to help them
release.

a. Start at the base of the nostrils. Gently hook your fingers into the tissue. Press down lightly against the bone and pull upwards to the eyes. While you are doing this, scrunch up your nose and relax. Scrunch and relax over and over until the stroke is done. Perform this stroke three times.
b. Perform the same stroke as above continuing to scrunch up the nose only this time, take the stroke out on more of an angle. Perform this stroke three times.
c. Perform the same stroke as above continuing to scrunch up the nose only this time, take the stroke out on even more of an angle. Perform this stroke three times.
d. Please your fingers directly under the center of your nose above your upper lips in the middle. Gently press the pads of your fingers towards the bones and create a tug away from your nose. While you perform this stroke, be pursing and relaxing your lips over and over again. Perform this stroke three times.
e. Place your
fingers firmly on the sides of your temples in line with the tops of your ears. Create a tug on the
tissue that moves upwards and slightly towards the back of your
head. While you perform this stroke you are to alternately bite
down, and open your mouth over and over again. Perform this stroke three
times.
7. Manual Fluid Drainage
Our last technique is designed to help drain fluids and puffiness from the face by stimulating the lymphatic system. These lymphatic organs lie very superficially directly under the skin so there is no need to apply great pressure. You're really just moving the skin around in a circular motion to shake up the lymph vessels of the neck.

a. Place your fingers right in front of the flap in the middle of your ears and move the skin around in a circular motion for about ten seconds.
b. Place your fingers underneath your chin and move the skin around in a circular motion for about ten seconds.
c. Place your fingers just above your clavicle (collar bone) and move the skin around in a circular motion for about ten seconds.
d. Bring your circular motions above the clavicle diagonally up the sides of the neck all the way around to the base of your skull and then allow your fingers to slide back down over the skin to their original position just above the clavicle.
There you have it! A lot of these techniques will come a lot easier to you once you have completed the Heal Thyself Series so if you haven't already, I highly suggest you check that out and don't forget to read Today's Focus. It will help keep you on track in your goal of achieving physical freedom. It is my wish for you that your life blossom into vibrant, radiant health! Use this connective tissue face-life class to show you how malleable your body really is. May this inspire you to complete the process on a full body level!